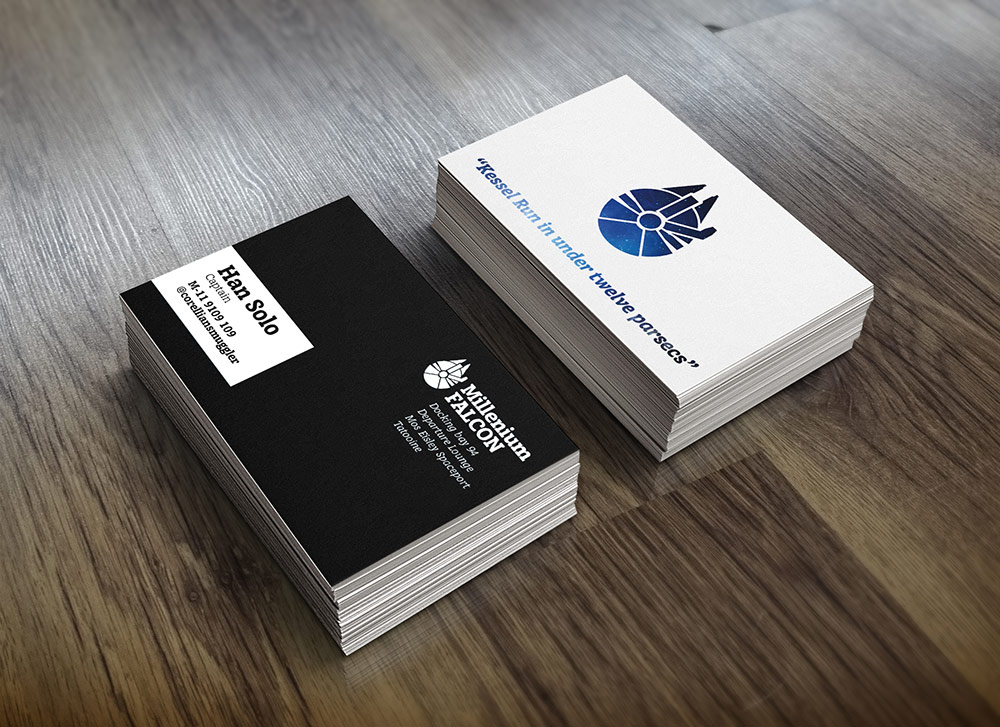
Your business card is often the first impression you make. If it looks unprofessional, you risk losing potential clients before you even say a word.
Thank you for reading this post, don't forget to subscribe!But how do you make sure your card is ready for printing without costly mistakes? In this guide, you’ll learn simple, step-by-step tips to prepare your business card perfectly. By the end, you’ll have a design that stands out, prints clearly, and truly represents your brand.
Keep reading to avoid common pitfalls and create a card you’ll be proud to hand out.

Credit: www.youtube.com
Choosing The Right Size
Choosing the right size for your business card is important. The size affects how your card looks and feels. It also impacts how easy it is to carry and store. Picking a size that fits your brand and purpose helps make a good impression. You can choose a standard size or go for a custom size. Both have benefits and suit different needs.
Standard Dimensions
Most business cards use standard sizes. The common size is 3.5 inches by 2 inches. This fits well in wallets and cardholders. Standard sizes make printing easy and often cost less. They look familiar to most people. Using standard sizes helps your card feel professional and neat. It also allows room for your logo, name, and contact details.
Custom Sizes
Custom sizes let you stand out from others. You can make your card square, tall, or extra wide. Custom cards attract more attention and show creativity. They help express your brand’s personality. Keep in mind, custom sizes may cost more to print. Some cardholders might not fit them well. Choose a size that balances uniqueness and convenience.
Selecting Paper Type
Choosing the right paper type is key for printing business cards. Paper affects the card’s look and feel. It changes how people see your brand. Picking the best paper helps your card stand out. It also impacts durability and texture. Think about how you want your card to feel in hand. This choice shapes the first impression your card makes.
Matte Vs Glossy
Matte paper has a smooth, non-shiny surface. It looks clean and professional. It does not reflect light, so it is easy to read. Matte cards feel soft and less slippery. They hide fingerprints and scratches well.
Glossy paper has a shiny, bright finish. It makes colors pop and look vibrant. Glossy cards catch light and draw attention. They feel smooth and slick to touch. They can show fingerprints but look more eye-catching.
Cardstock Weight Options
Cardstock weight tells how thick and heavy the card is. Common weights range from 250 to 400 grams per square meter (gsm). Lighter cardstock feels thinner and more flexible. Heavier cardstock feels strong and sturdy. Heavy cards last longer and feel more valuable.
Choose a weight that matches your brand style. Thin cards suit casual or creative brands. Thick cards fit luxury or formal brands. Balance cost and quality for the best result.
Designing Your Layout
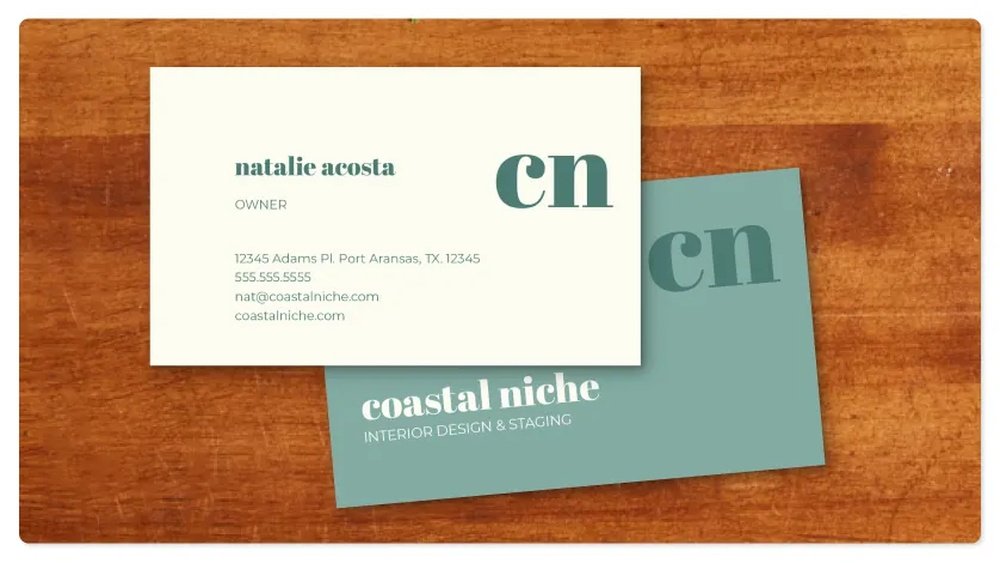
Designing your business card layout is a key step before printing. It shapes how people see your brand. A clear, neat design helps your card stand out. Focus on balance and space. Every element should have a purpose. A crowded card can confuse or turn people away.
Think about what information is most important. Name, title, phone, and email must be easy to find. Use fonts that are easy to read. Colors should match your brand but not clash. Planning your layout carefully saves time and cost later.
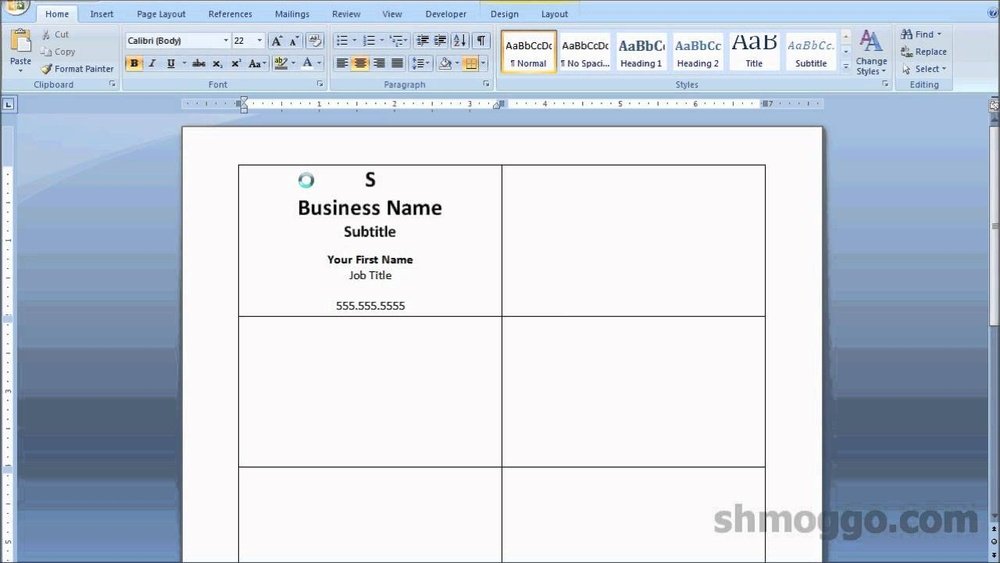
Using Templates
Templates offer a simple start for your design. They provide a ready-made structure for text and images. This saves effort and ensures correct size and margins. Choose a template that fits your style and business type. Many templates are free or low cost.
Templates keep your design clean and professional. They help avoid common mistakes like cutting text too close to edges. Editing a template is easy with basic software. This helps create a polished final product quickly.
Incorporating Brand Elements
Brand elements make your card unique and memorable. Use your logo clearly and at the right size. Keep colors consistent with your brand palette. Fonts should match or complement your usual style.
Add small touches like icons or patterns from your brand. These details tie the card to your other marketing materials. Consistency builds trust and recognition with your audience. Avoid using too many elements; keep it simple and clean.
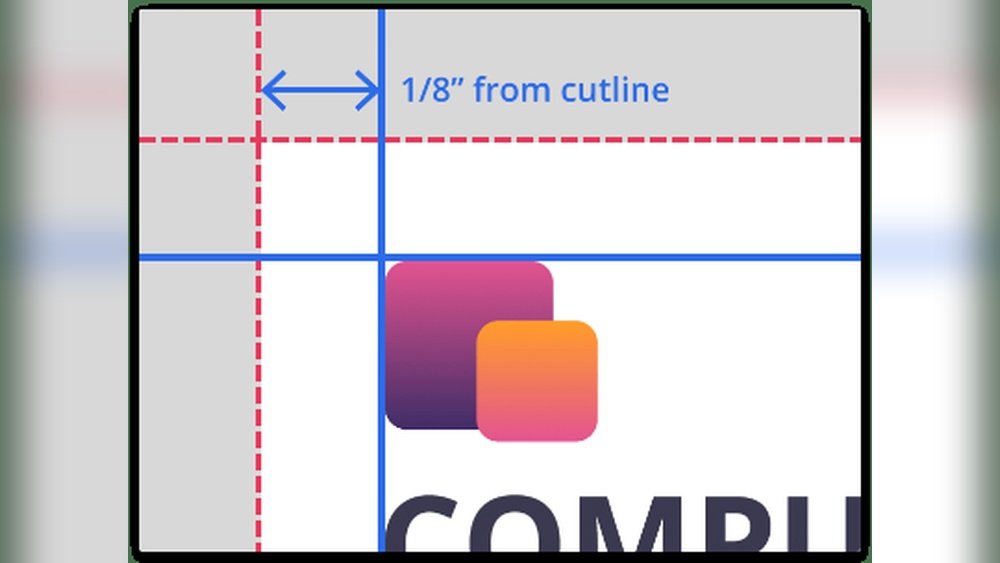
Setting Up Bleed And Margins
Setting up bleed and margins is a key step in preparing your business card for printing. These settings help avoid unwanted white edges and keep important details safe. Proper bleed and margin setup ensures your final card looks professional and clean.
Bleed extends your design beyond the card’s edge. Margins create a safe area inside the card’s edge. Together, they guide the printer and protect your design.
Importance Of Bleed
Bleed is extra space around your design that printers cut off later. It prevents thin white lines on the edges of your card. Without bleed, small cutting errors can ruin your card’s look. Usually, bleed is about 1/8 inch (3 mm) beyond the card size. It helps your colors and images reach the edge perfectly.
Safe Zone Guidelines
The safe zone is the inner margin where no text or logos should go. It stops important details from being cut off. Keep all key information at least 1/8 inch (3 mm) inside the card edge. This area protects your text and logos during trimming. Staying inside the safe zone keeps your card clear and readable.
Choosing Fonts And Colors
Choosing the right fonts and colors is key for a great business card. These elements affect how people see your brand. Clear fonts and good colors make your card easy to read and memorable. Poor choices can confuse or turn off potential clients. Focus on simplicity and contrast for best results.
Readable Font Choices
Select fonts that are simple and clean. Avoid fancy or cursive fonts that are hard to read. Sans-serif fonts like Arial, Helvetica, or Calibri work well for business cards. Use font sizes no smaller than 8 points. Keep your text clear, especially for contact details. Limit font styles to two to keep the design neat. Bold important information like your name or phone number.
Color Modes For Printing
Use the CMYK color mode for printing, not RGB. CMYK stands for Cyan, Magenta, Yellow, and Black. It matches the colors printers use. RGB is for screens and may print differently. Choose colors with strong contrast for better readability. Dark text on a light background or vice versa works best. Test colors by printing a sample before finalizing your design.
Adding Images And Logos
Adding images and logos to your business card makes it stand out. These elements show your brand and help people remember you. To look professional, the images must be clear and sharp. Poor quality images can make your card look cheap. Choose the right size and quality before printing.
High-resolution Requirements
Use images with a high resolution for printing. The best quality is 300 dots per inch (DPI). Lower DPI images may look blurry or pixelated. Check your logo and photos for this resolution. Bigger image files usually mean better print results. Avoid stretching small images to fit the space.
File Formats
Save your images in the correct file format. PDF, TIFF, and EPS files keep the quality high. JPEG files can work but choose the highest quality setting. PNG files are good for logos with transparent backgrounds. Avoid using low-quality or compressed image formats. This helps keep your business card sharp and clear.
Proofreading And Final Checks
Proofreading and final checks are the last steps before printing your business card. These steps catch small mistakes that can cause big problems. A simple typo or wrong phone number can confuse your contacts. Careful checking saves time and money.
Take time to review every detail. Look at the text and layout. Make sure everything is clear and correct. This process improves your card’s professionalism and trustworthiness.
Spelling And Contact Info
Check all words for spelling errors. Even one wrong letter can seem unprofessional. Verify names, job titles, and addresses carefully. Double-check phone numbers and email addresses. Confirm website URLs are spelled right. Accurate contact info helps people reach you easily.
Visual Inspection
Look at the card’s design closely. Ensure all text is readable and not too small. Check colors for good contrast and consistency. Make sure logos and images are sharp and clear. Look for alignment issues or uneven spacing. A clean, balanced design creates a strong impression.

Credit: www.youtube.com
Preparing Files For Print
Preparing files for print is a key step for a perfect business card. The files must be clear and follow printer rules. This avoids errors and saves time. Good preparation helps your card look sharp and professional.
File setup includes size, colors, and bleed areas. Also, file format affects the print quality. Files must be easy for printers to read and use without changes.
Exporting Pdfs
PDF is the best format for printing business cards. It keeps all design details intact. Export your file in high resolution, at least 300 dpi.
Choose the PDF/X-1a standard if possible. This format supports color and fonts well. Embed all fonts and images to avoid missing parts.
Set the file size to the exact card size plus bleed. Use CMYK color mode for accurate print colors. Double-check the export settings before saving.
Including Crop Marks
Crop marks show where to cut the card. They guide the printer for precise trimming. Always add crop marks outside the design area.
Include a bleed area of 3 mm around the card edges. This prevents white edges after cutting. Crop marks and bleed together ensure clean card edges.
Do not place important text or logos near crop marks. Keep important content inside the safe zone. This avoids cutting off crucial information.
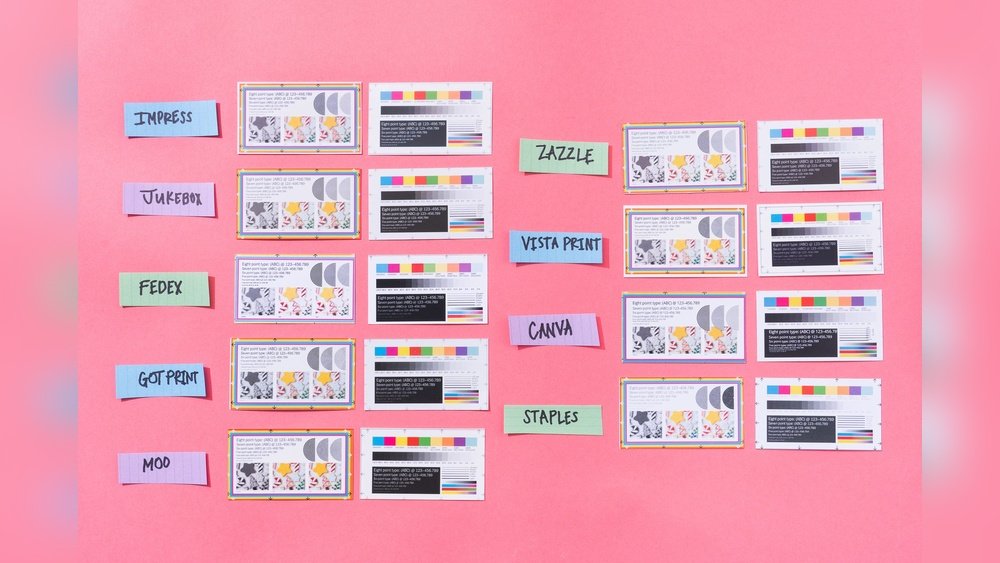
Choosing A Printing Service
Choosing the right printing service is key to a great business card. The printer affects the quality, price, and delivery time. You want a service that fits your needs and budget.
Consider the type of printer and what they offer. Some give fast service, others focus on high quality. Knowing the differences helps you pick the best option.
Online Vs Local Printers
Online printers offer convenience. You upload your design and receive cards by mail. They often have many templates and options.
Local printers let you see samples and talk face-to-face. You can check paper quality before printing. They may offer faster pickup and personal help.
Choose online for ease and variety. Choose local for personal service and quick changes.
Cost Considerations
Prices vary by printer type and order size. Online printers often have lower costs for big orders. Local printers might charge more but offer discounts for repeat clients.
Check for hidden fees like setup or delivery. Compare prices but don’t choose only by cost. Balance price with quality and service.
Credit: blog.spoongraphics.co.uk
Frequently Asked Questions
What Is The Ideal Business Card Size For Printing?
The standard business card size is 3. 5 x 2 inches. This size fits most wallets and cardholders. Always confirm with your printer for custom sizes.
How To Choose The Best Paper For Business Cards?
Select a thick, sturdy paper like 300gsm for durability. Matte or glossy finishes enhance appearance. Consider texture based on your brand style.
Why Is Bleed Important In Business Card Design?
Bleed prevents unwanted white borders after trimming. Add 0. 125 inches bleed on all sides. This ensures your design extends to the card’s edge.
How To Ensure Text Readability On Business Cards?
Use clear fonts sized at least 8-10 points. Maintain contrast between text and background. Avoid clutter for easy reading at a glance.
Conclusion
Preparing your business card for printing takes careful steps. Choose the right size and layout. Use clear fonts and high-quality images. Check all details for spelling mistakes. Save the file in the correct format. Print a test copy to review colors and alignment.
These small actions help create a professional card. A well-made business card leaves a good impression. Follow these tips to ensure your card looks great. Ready to share your contact with confidence?